Complete guide to emails in Whisper
Everything you need to know about handling customer emails with AI in one place.
Updated: 3 June 2026
Whisper's Email Support takes your customer service to the next level. Artificial intelligence takes over the routine work, automatically preparing draft replies and specific action suggestions for you.
It's important to know that Whisper doesn't work with isolated emails. Instead, it displays complete conversation threads—giving you the entire communication history with a customer, much like a standard chat.
How it all works#
Once you connect your email inbox (e.g., via Gmail or IMAP/SMTP), Whisper starts fetching incoming messages. For each one, it understands the context and immediately suggests a draft reply or a specific step (like issuing a refund or changing a delivery address). All you have to do is review the suggestion and approve it with a single click.
Email view modes#
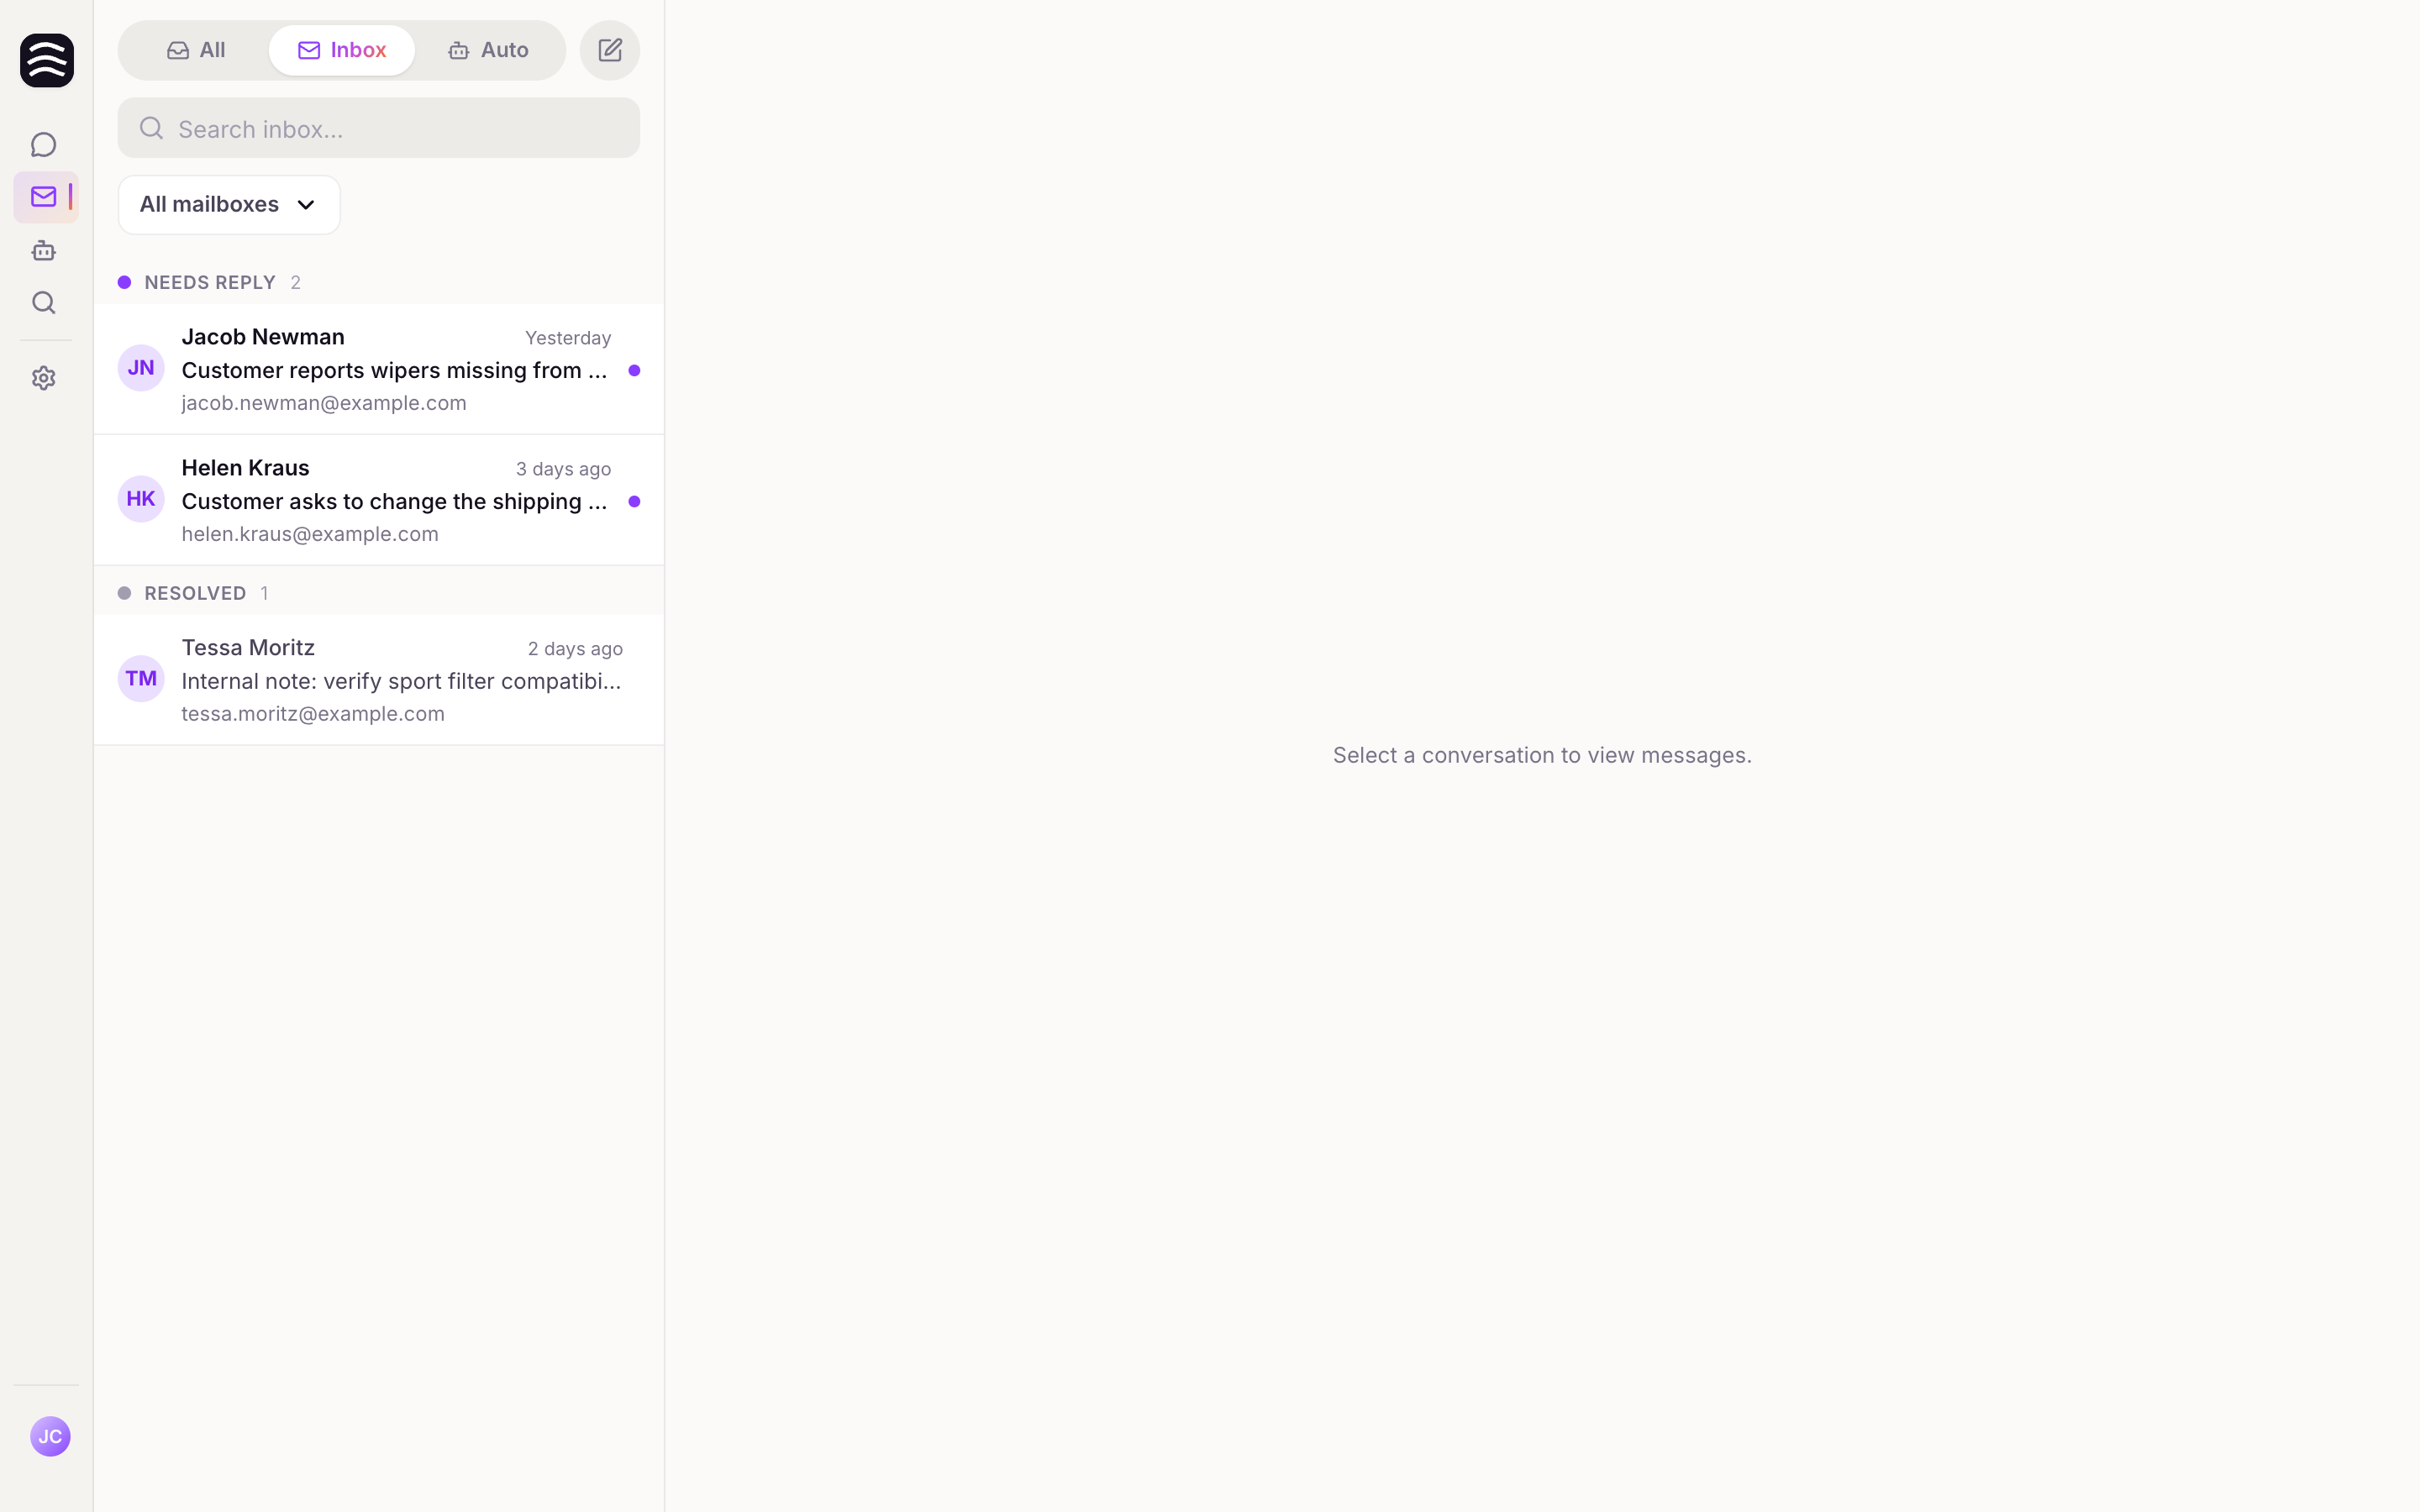
At the top of the screen, you'll find a toggle between the All, Inbox, and Auto tabs, plus a button for a Compose new email. Here are the three main modes you'll work with:
- Inbox — your primary workspace, which opens by default. Here you'll find messages waiting for your response (Needs reply) as well as those already handled (Resolved). This is where you'll spend most of your time.
- Auto — Whisper automatically moves messages here that don't require your attention (the Ghost filter). These are typically newsletters, order confirmations, and similar emails. If something important wanders in here, you can easily move it back with the Move to Inbox button.
- All — an overview of absolutely all threads regardless of their status. It's great when you need to track down older communication. You can also turn on spam visibility here (Show SPAM). However, we don't recommend this mode for your daily routine.
Understanding the Email Interface#
To make your workflow as smooth as possible, we've divided the email interface into three clear panes. Whisper doesn't work with isolated messages, but with entire conversation threads—so you always have the complete communication history with a customer right in front of you.

1. Thread list (Left pane)#
Here you'll find an overview of all your email conversations.
- View modes: Easily switch between the All, Inbox, and Auto tabs (learn more in the daily email workflow section).
- Needs reply / Resolved: In the Inbox, threads are split into those waiting for your reply and those already resolved.
- Search: Quick full-text search within your current view.
- Mailbox selector: You can view threads from multiple connected mailboxes at the same time.
- Presence indicators: Avatars show you right away if a colleague is currently reading the same thread.
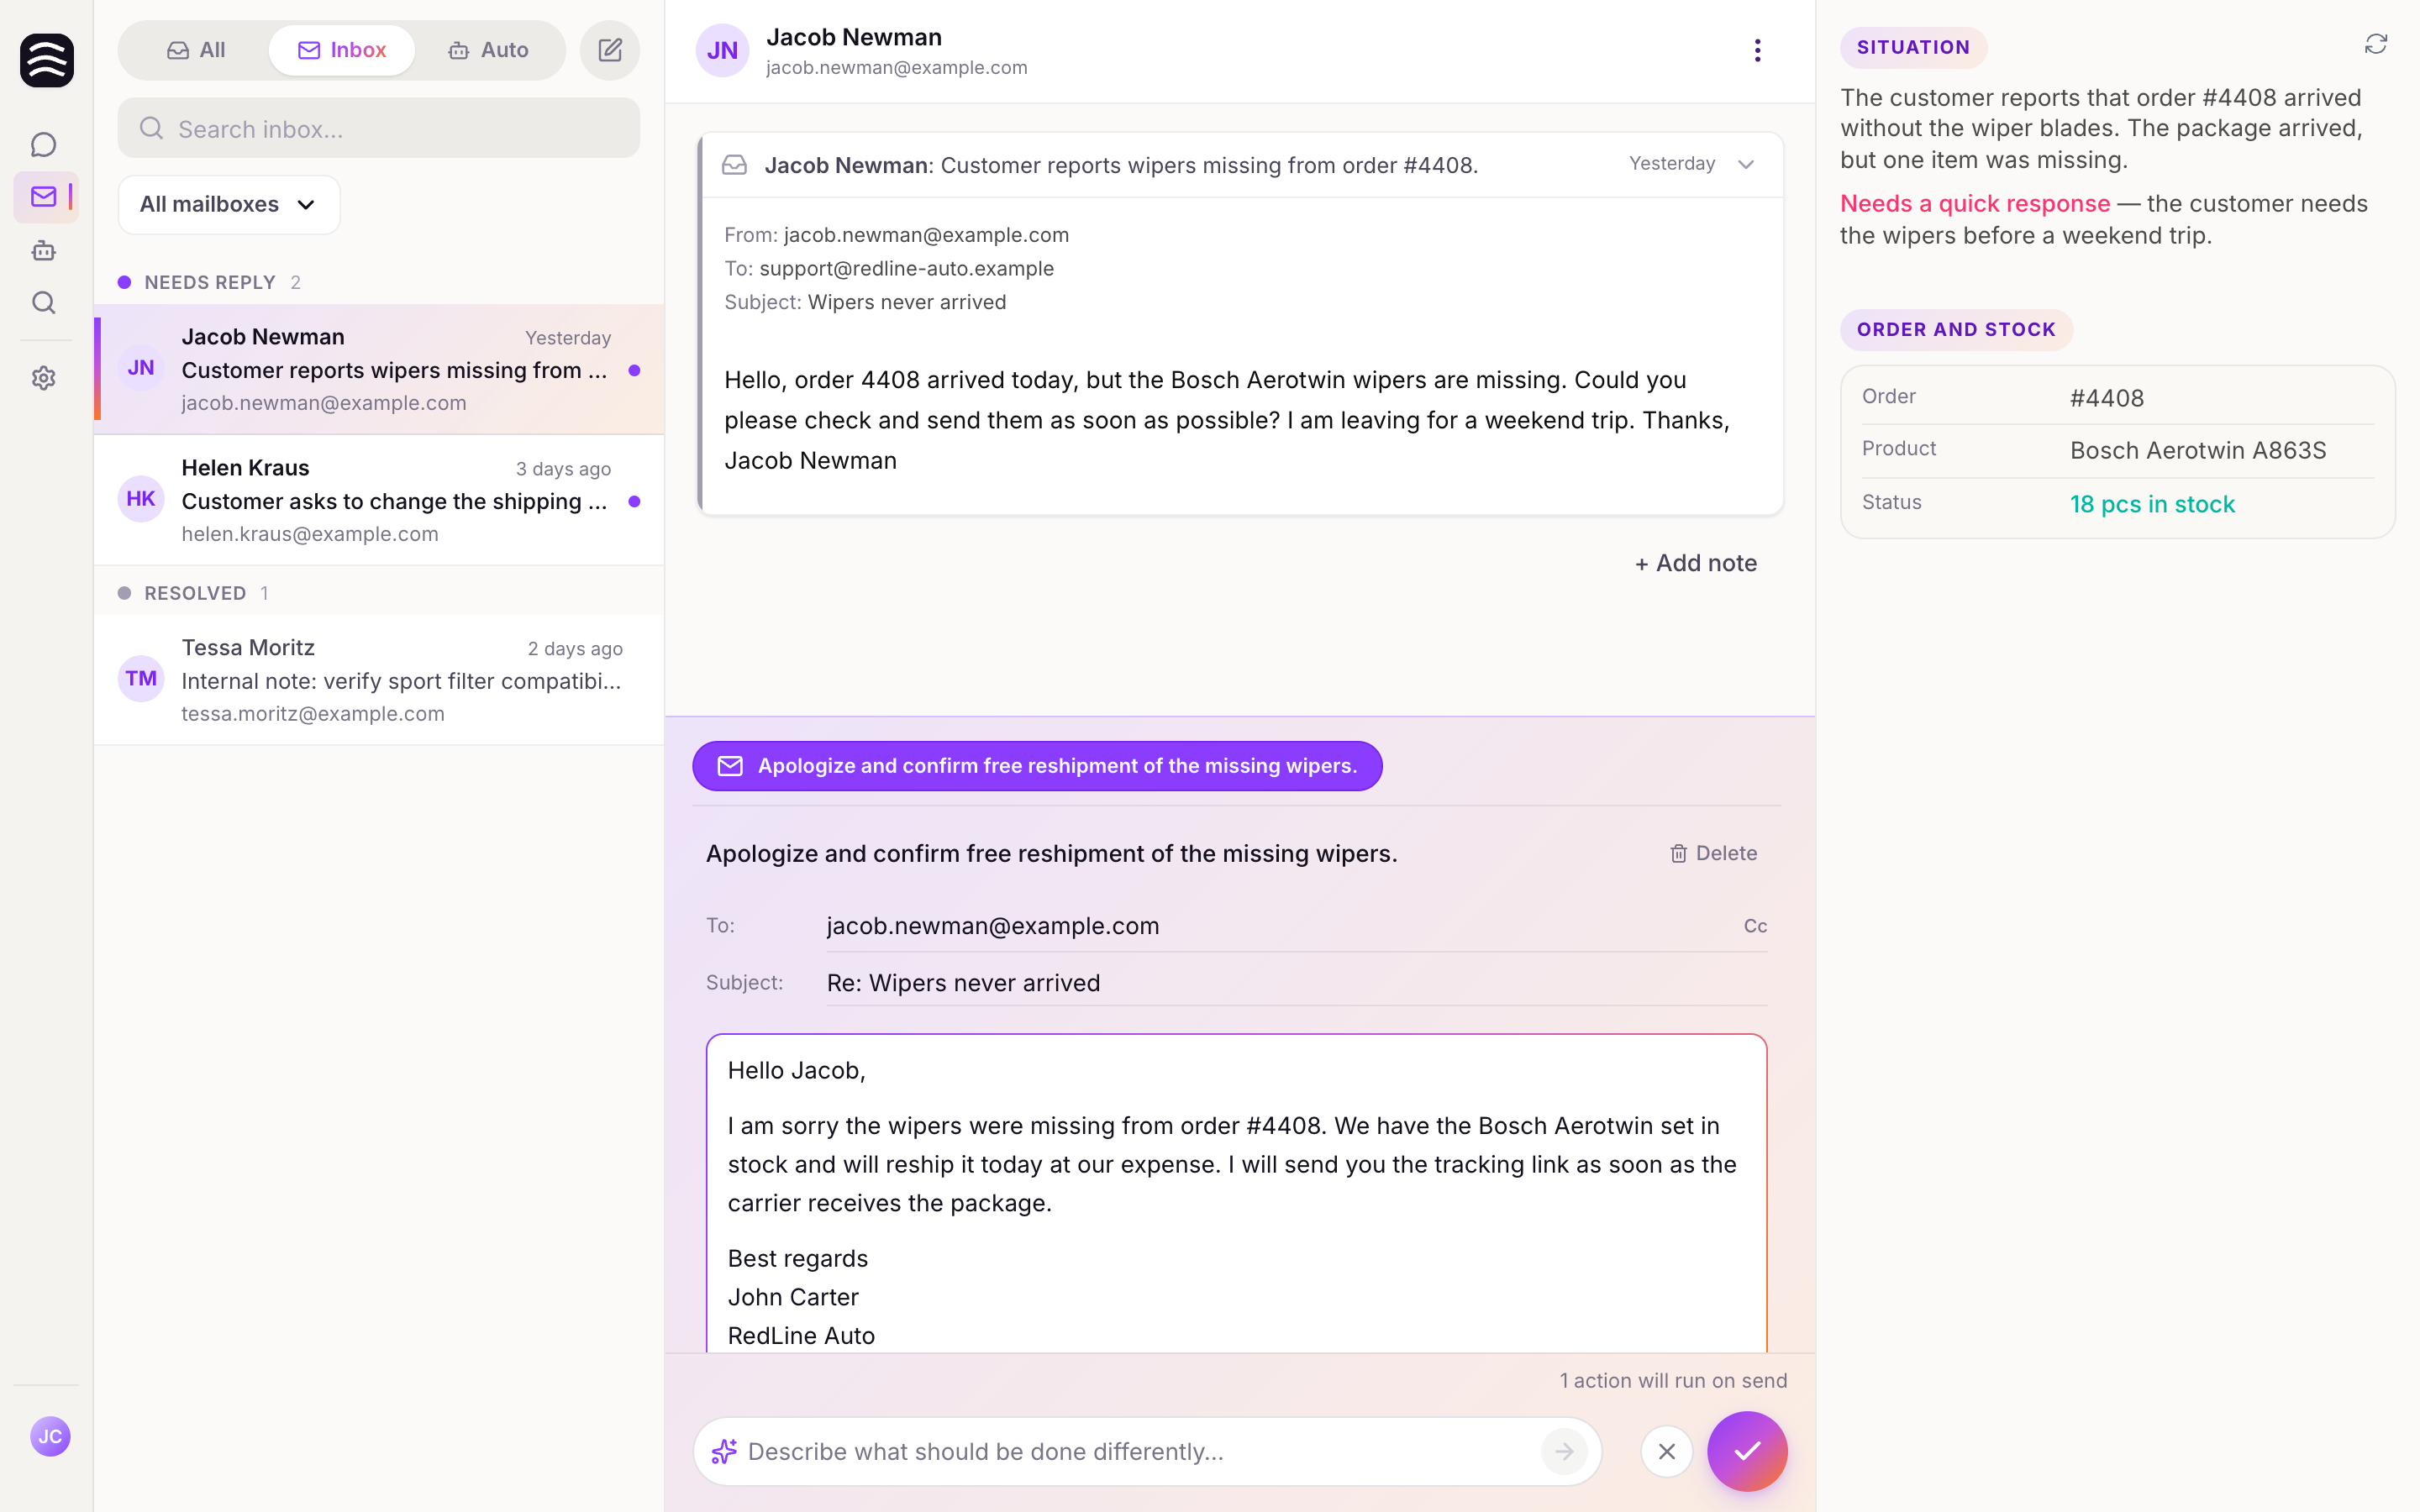
2. Conversation view (Center pane)#
This is where the most important work happens—the actual communication with the customer.
- Message history: You'll see the entire thread history from the moment you connected the mailbox to Whisper. The newest message is always expanded.
- AI suggestions: At the bottom of the screen, you'll find pre-drafted replies and suggested actions waiting for you.
- Thread actions: You can Approve, Ignore, Save for later, or Mark as spam directly from the suggestions.
3. Context panel (Right pane)#
This panel provides all the necessary background information so you don't have to keep switching to other systems.
- Dynamic context: Whisper automatically extracts important details about the customer and their order from the conversation content. This context is generated when the email arrives and updates automatically every day.
- Related threads: Quick access to previous conversations with the same customer.
- Manual context refresh: You can trigger an update manually using the button in the top-right corner. It takes a few dozen seconds, during which you can comfortably work on other emails.
How to handle spam#
- If you want to see messages that fell into spam, switch to the All mode and turn on the Show spam toggle.
- Found a message in spam that doesn't belong there? Click Not spam. The message will move back to your inbox and the system will learn from it for the future.
- Conversely, you can easily move unwanted mail to spam using the Mark as spam action directly in the conversation view.
Daily email workflow#
Whisper shows emails as conversation threads — similar to a chat. Each thread is the full history with a customer, not a single message. This guide walks through a typical operator workflow.
Where to spend your day#
At the top of the Email interface, switch between All, Inbox, Auto, and Compose new email. For everyday work, stay in Inbox — it is selected by default.
Inbox — your main workspace#
Inbox shows conversations that needed or still need human attention. The list is split into two sections:
- Needs reply — open tickets without a reply. This is where you spend most of your time.
- Resolved — already handled conversations for visibility only. No action required.
In the thread list you can:
- Full-text search within the current view.
- Select one or more mailboxes — the mailbox selector is a multiselect, so you can see threads from multiple inboxes at once.
Auto — automatically filtered emails#
Auto shows threads Whisper classified as not needing your reply. These are typically marketing emails, automatic confirmations, and other messages labeled Ghost.
Ghost is an automatic filter that keeps your Inbox clean. It is not perfect — if you want to reply, use Move to Inbox and handle the thread from there.
In the future, Auto will also show fully automated replies (e.g. order status questions) when you enable them in settings.
All — search across everything#
All shows every thread in the selected mailboxes regardless of status — resolved, automated, or manually handled. Enable Show SPAM to include spam.
Use All when you are looking for a specific old email and do not know its status. For day-to-day work, use Inbox.
Typical thread resolution flow#
Open a Needs reply thread
The center pane shows the conversation history. The latest message is expanded.
Review the context
The right Situation and Context panel shows customer and order information. Context is generated when the email arrives and refreshed daily. Use the refresh button in the top-right corner for the latest data — this can take up to a minute; you can work on another thread while it runs.
Review proposed actions
At the bottom of the screen Whisper suggests a reply and next steps. Purple actions run after approval; orange ones are manual tasks — see the Working with AI-Suggested Actions section.
Approve or ignore
Approve sends the reply and runs approved actions. Ignore closes the thread without action — use when no reply is needed.
Related Articles#
Working with AI-Suggested Actions#
Whisper's AI analyzes incoming emails and generates context-aware draft replies and one-click actions.
Purple and orange actions#
At the bottom of the screen (Actions section), Whisper proposes a set of steps to resolve the thread:
- Purple actions — Whisper runs these automatically when you click Approve (e.g. sending a reply, canceling an order in your store).
- Orange actions — manual tasks you must complete yourself (physical world or steps without an integration). Mark them done by clicking the circle checkbox — only then can Whisper continue with automatic steps.
You can expand any action to edit its description or delete it if Whisper suggested something wrong.
Reviewing and Editing Suggestions#
When you open a thread that "Needs reply", you will see the AI's suggestions.
- Editing: You can modify the drafted text directly before approving. Changes are auto-saved.
- Attachments: Add or remove file attachments from the suggested reply.
Copilot Prompt#
If the AI's suggestion isn't quite right, you don't have to rewrite it manually. Use the Copilot prompt at the bottom of the screen.
- Edit existing actions: Describe what should change (e.g. "Make the tone more formal" or "Add information about our 30-day return policy").
- New actions: Copilot can also add new actions — e.g. "Forward this email to a colleague on the returns team".
Approving a Thread#
Once you are satisfied with the suggestions, click Approve to run purple actions and send the reply.
- Unchecked manual tasks: If orange actions remain unchecked, a dialog asks you to mark them done or delete them before approving.
- Approve Footer: A summary at the bottom shows what will happen when you click approve (e.g. "1 action will run on send").
Ignore — close without action#
Ignore closes the thread without sending a reply or running actions. Use it when no response is needed — the thread moves to resolved.
Other Thread Actions#
- Save for later: Keep the thread open but move on to the next one.
- Mark as spam: Flag the message to improve filtering.
Related Articles#
Composing New Emails#
You can start a new conversation with a customer directly from Whisper—no need to wait for them to reach out first.
How to compose a new email#
Navigate to the Email page
Click on Email in the left sidebar.
Click Compose new email
Click the Compose new email button (the pen icon) at the top of the thread list.
Start writing your message
A new pane will open where you can immediately start drafting your email.
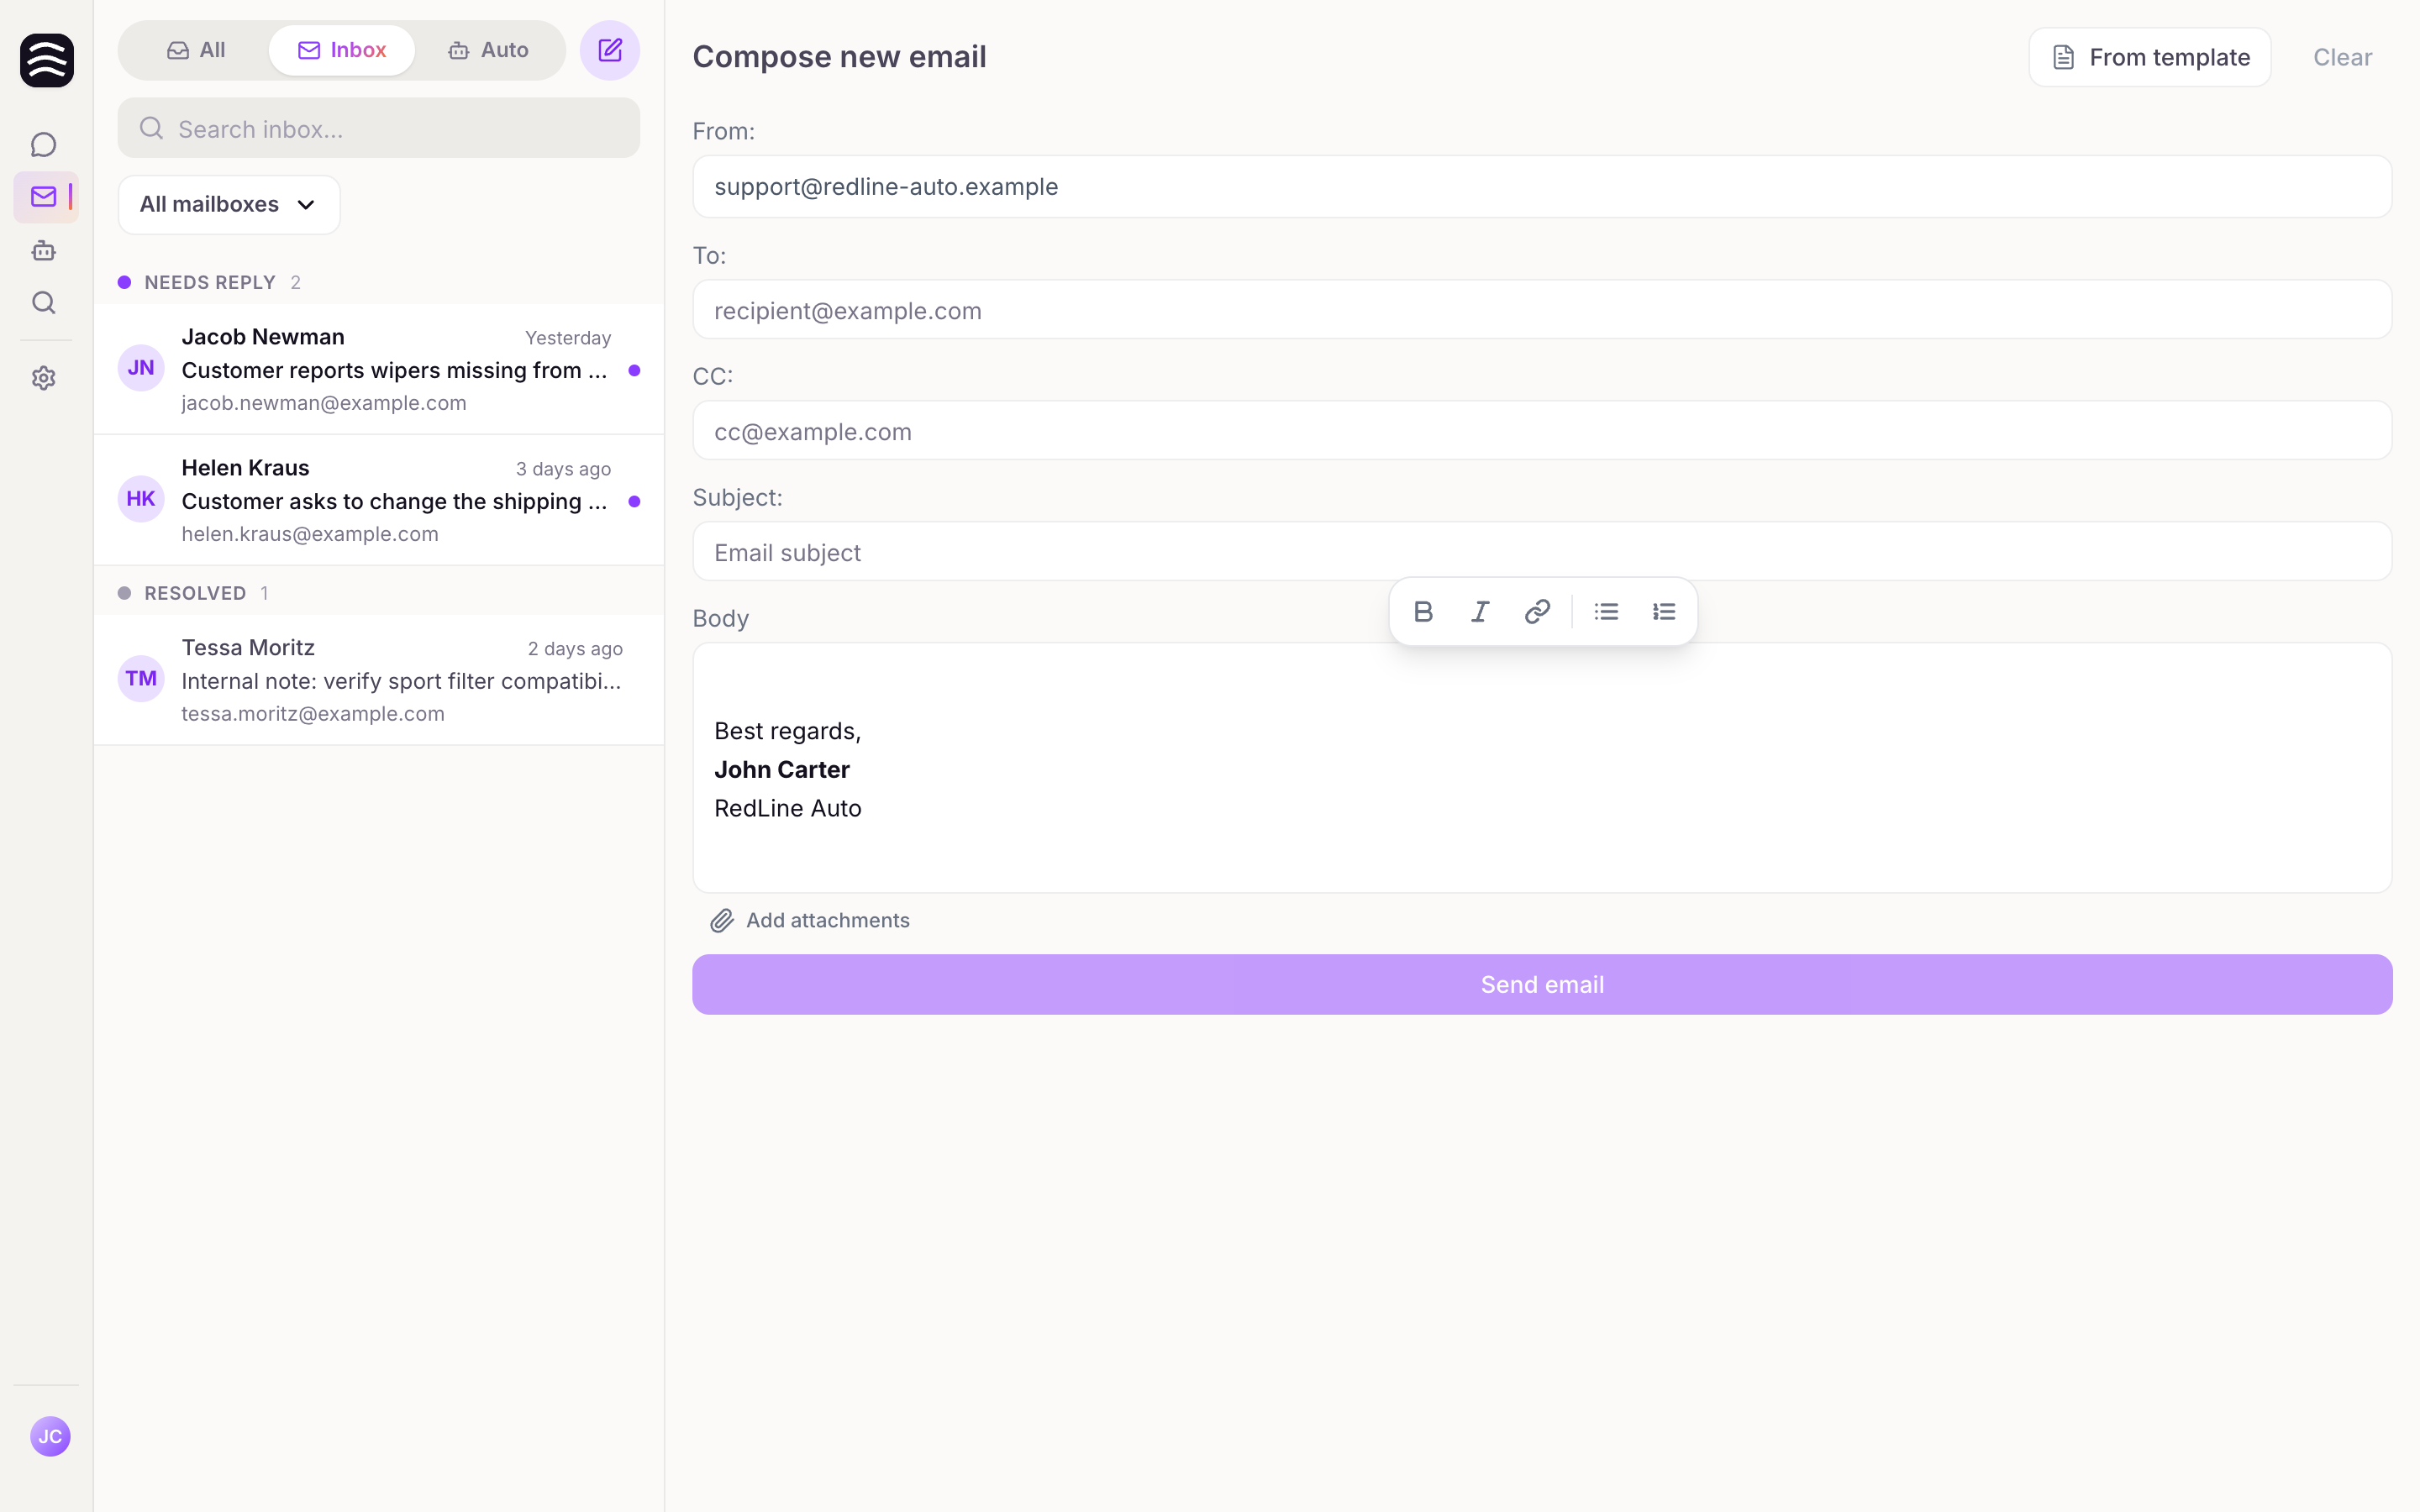
Understanding the compose fields#
- From: Select the mailbox (integration) you want to send the email from.
- To: Enter the recipient's email address. Whisper automatically suggests saved contacts based on your connected integrations.
- CC: Click "Cc" to add additional recipients to the carbon copy.
- Subject: Fill in the subject line of your message.
- Body: Write the actual content of your email here.
Using templates#
To save time, click From template to quickly insert one of your pre-saved responses into the message.
Open thread detection#
If you try to email a customer who already has an active, open conversation, Whisper smartly alerts you:
- You'll see a warning: "The recipient has an open conversation. Do you want to reply in thread instead?"
- You can jump straight into the existing thread, keeping all communication neatly organized in one place.
Sending your message#
Once your email is ready, click Send email. You'll then choose from these options:
- Send and close: Sends the email and immediately marks the conversation as resolved.
- Send and keep open: Sends the email but leaves the thread active so you can follow up later.
Resolved Threads and Follow-ups#
Once an email thread is handled, it is marked as resolved. However, you can always review the history or reopen it if necessary.
Viewing Resolved Threads#
- In the Inbox mode, you can see threads categorized as "Resolved".
- When you open a closed thread, you can view the entire message history and conversation view.
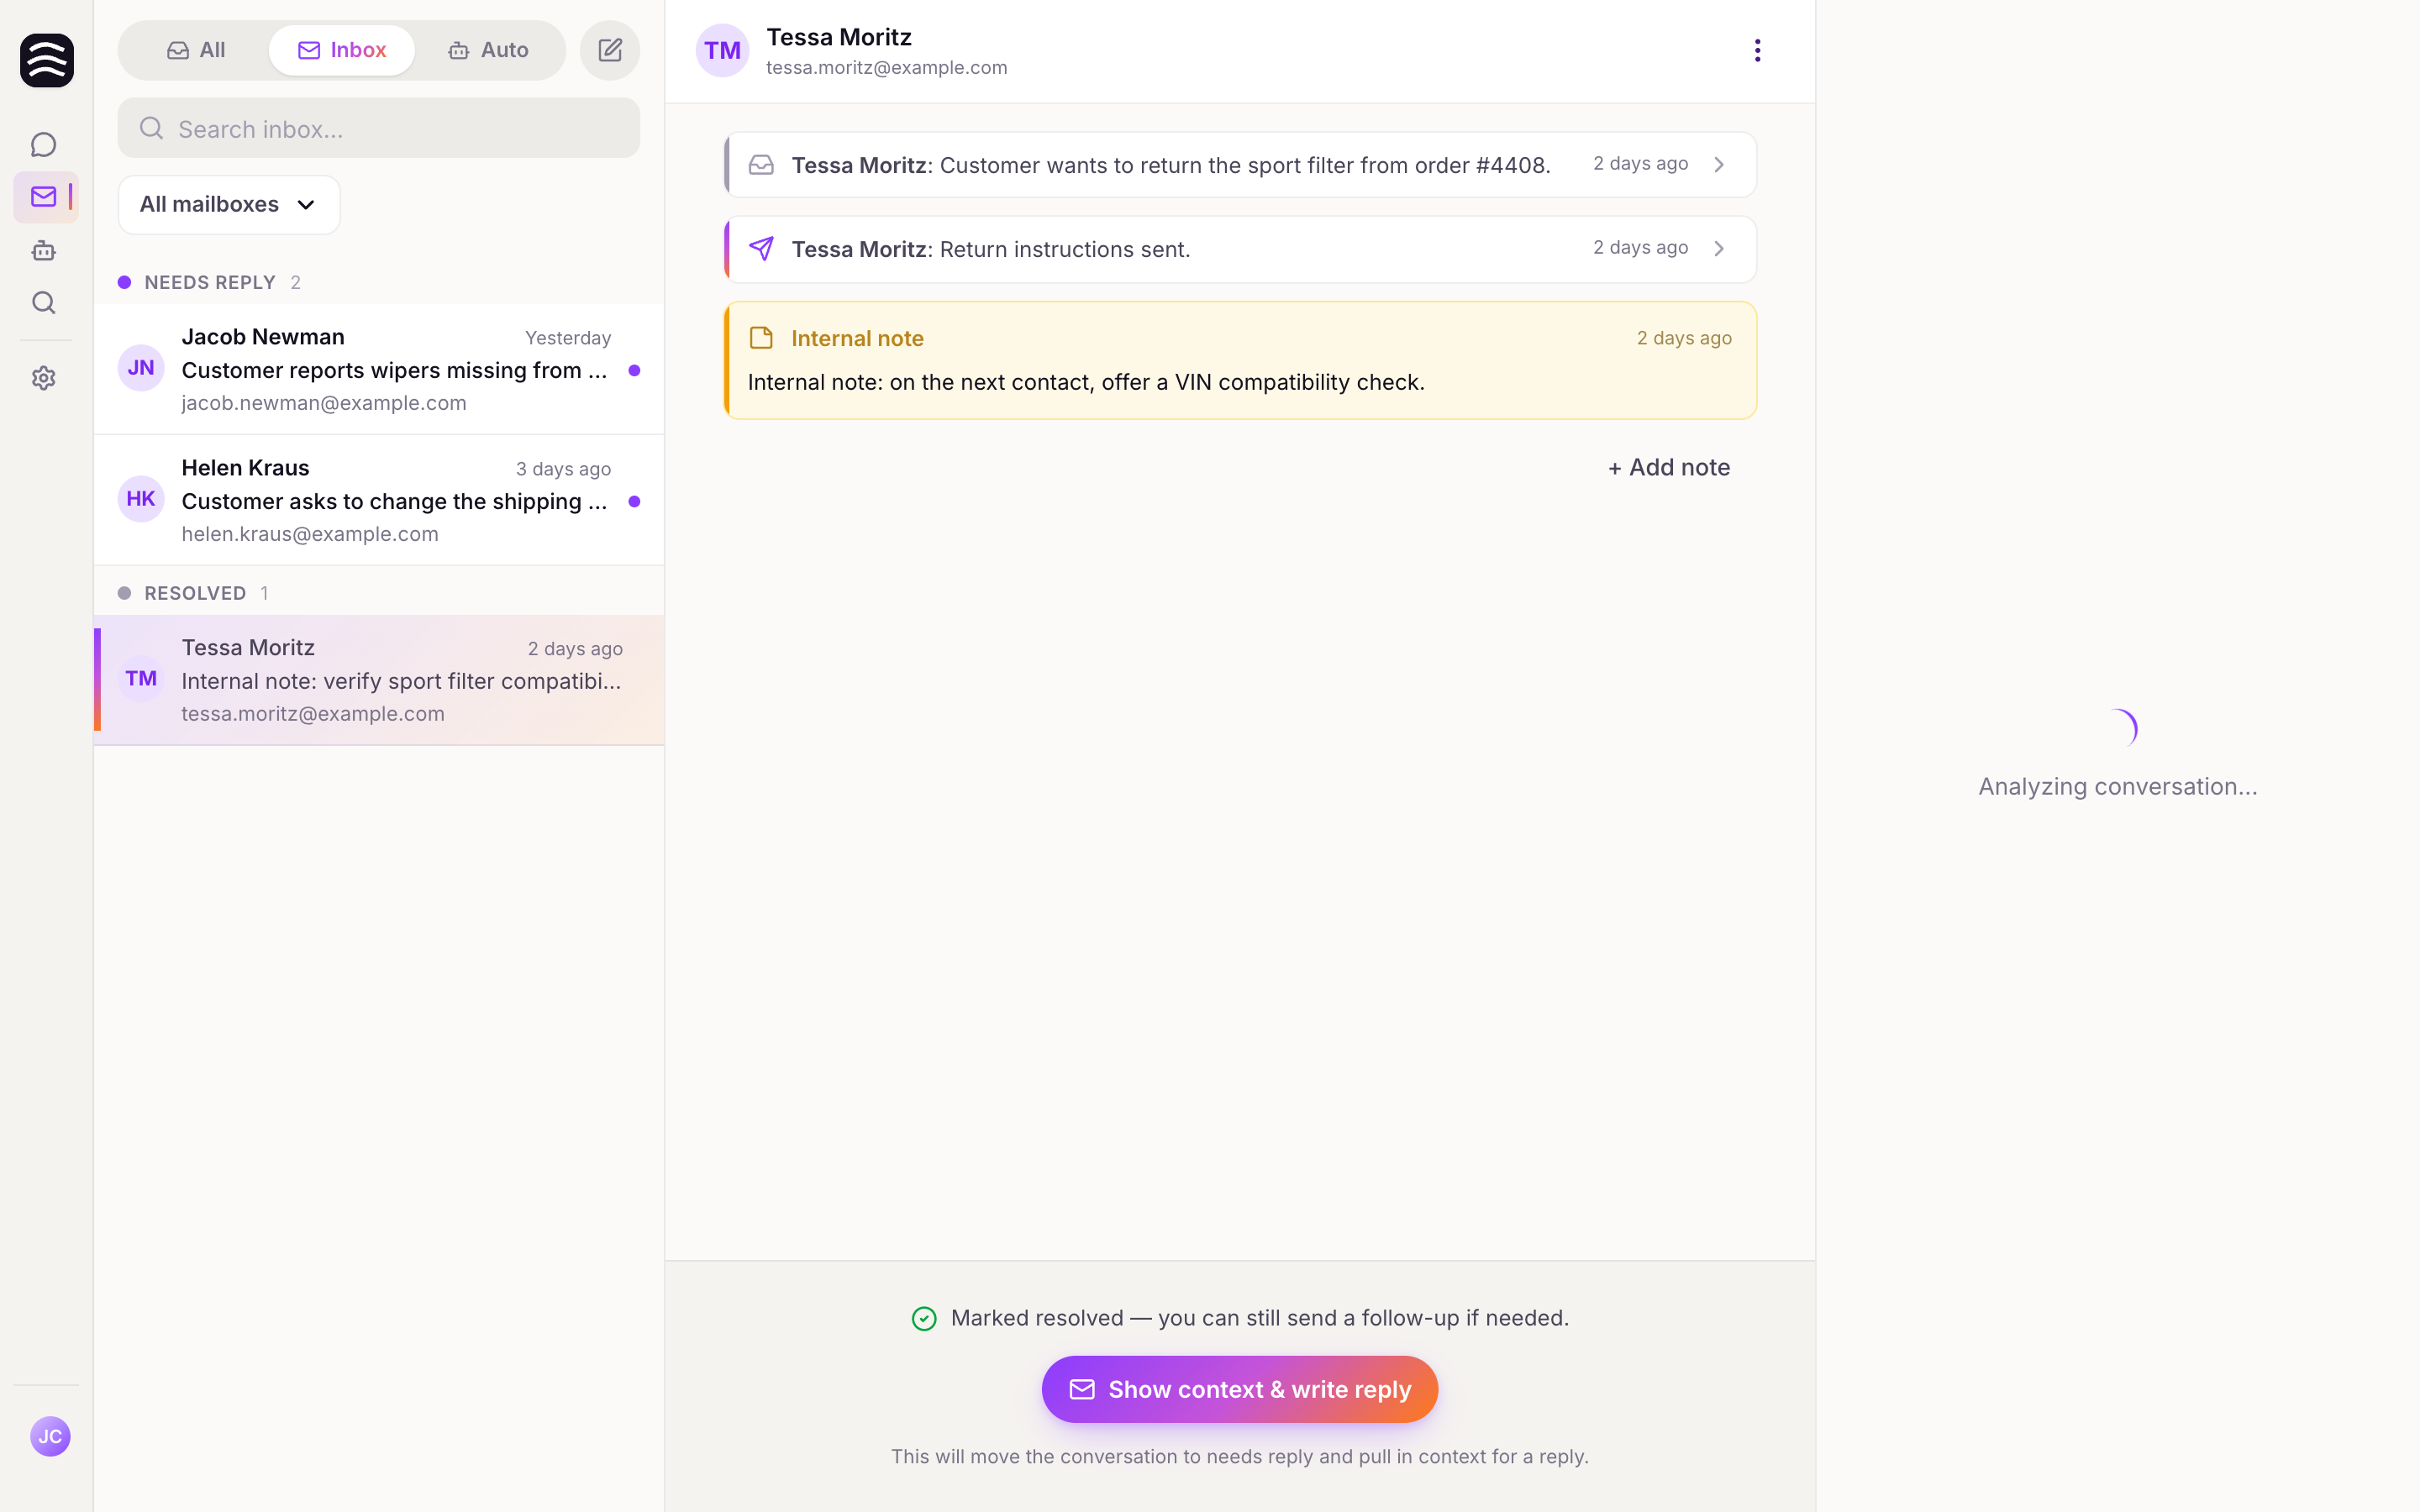
Following Up#
If you need to contact the customer again regarding a resolved issue:
Open the closed thread
Open the closed thread.
Click the Show context & write reply at
Click the Show context & write reply (or Follow up) button at the bottom of the conversation.
Draft a new message
This action moves the thread back to the "Needs reply" status and pulls in the context so you can draft a new message.
Internal Notes#
Even after a thread is closed, you can add internal notes. Click + Add note to leave a comment for your team. These notes are visible only to operators and are never sent to the customer.
Related Articles#
Managing Email Templates#
Templates allow you to save frequently used responses, saving your team time and ensuring consistent communication.
Creating a Template#
From the Email page
From the Email page, open the compose pane and click Manage templates, or navigate directly to the
/templatesroute if you have it bookmarked.Click Create template
Click Create template.
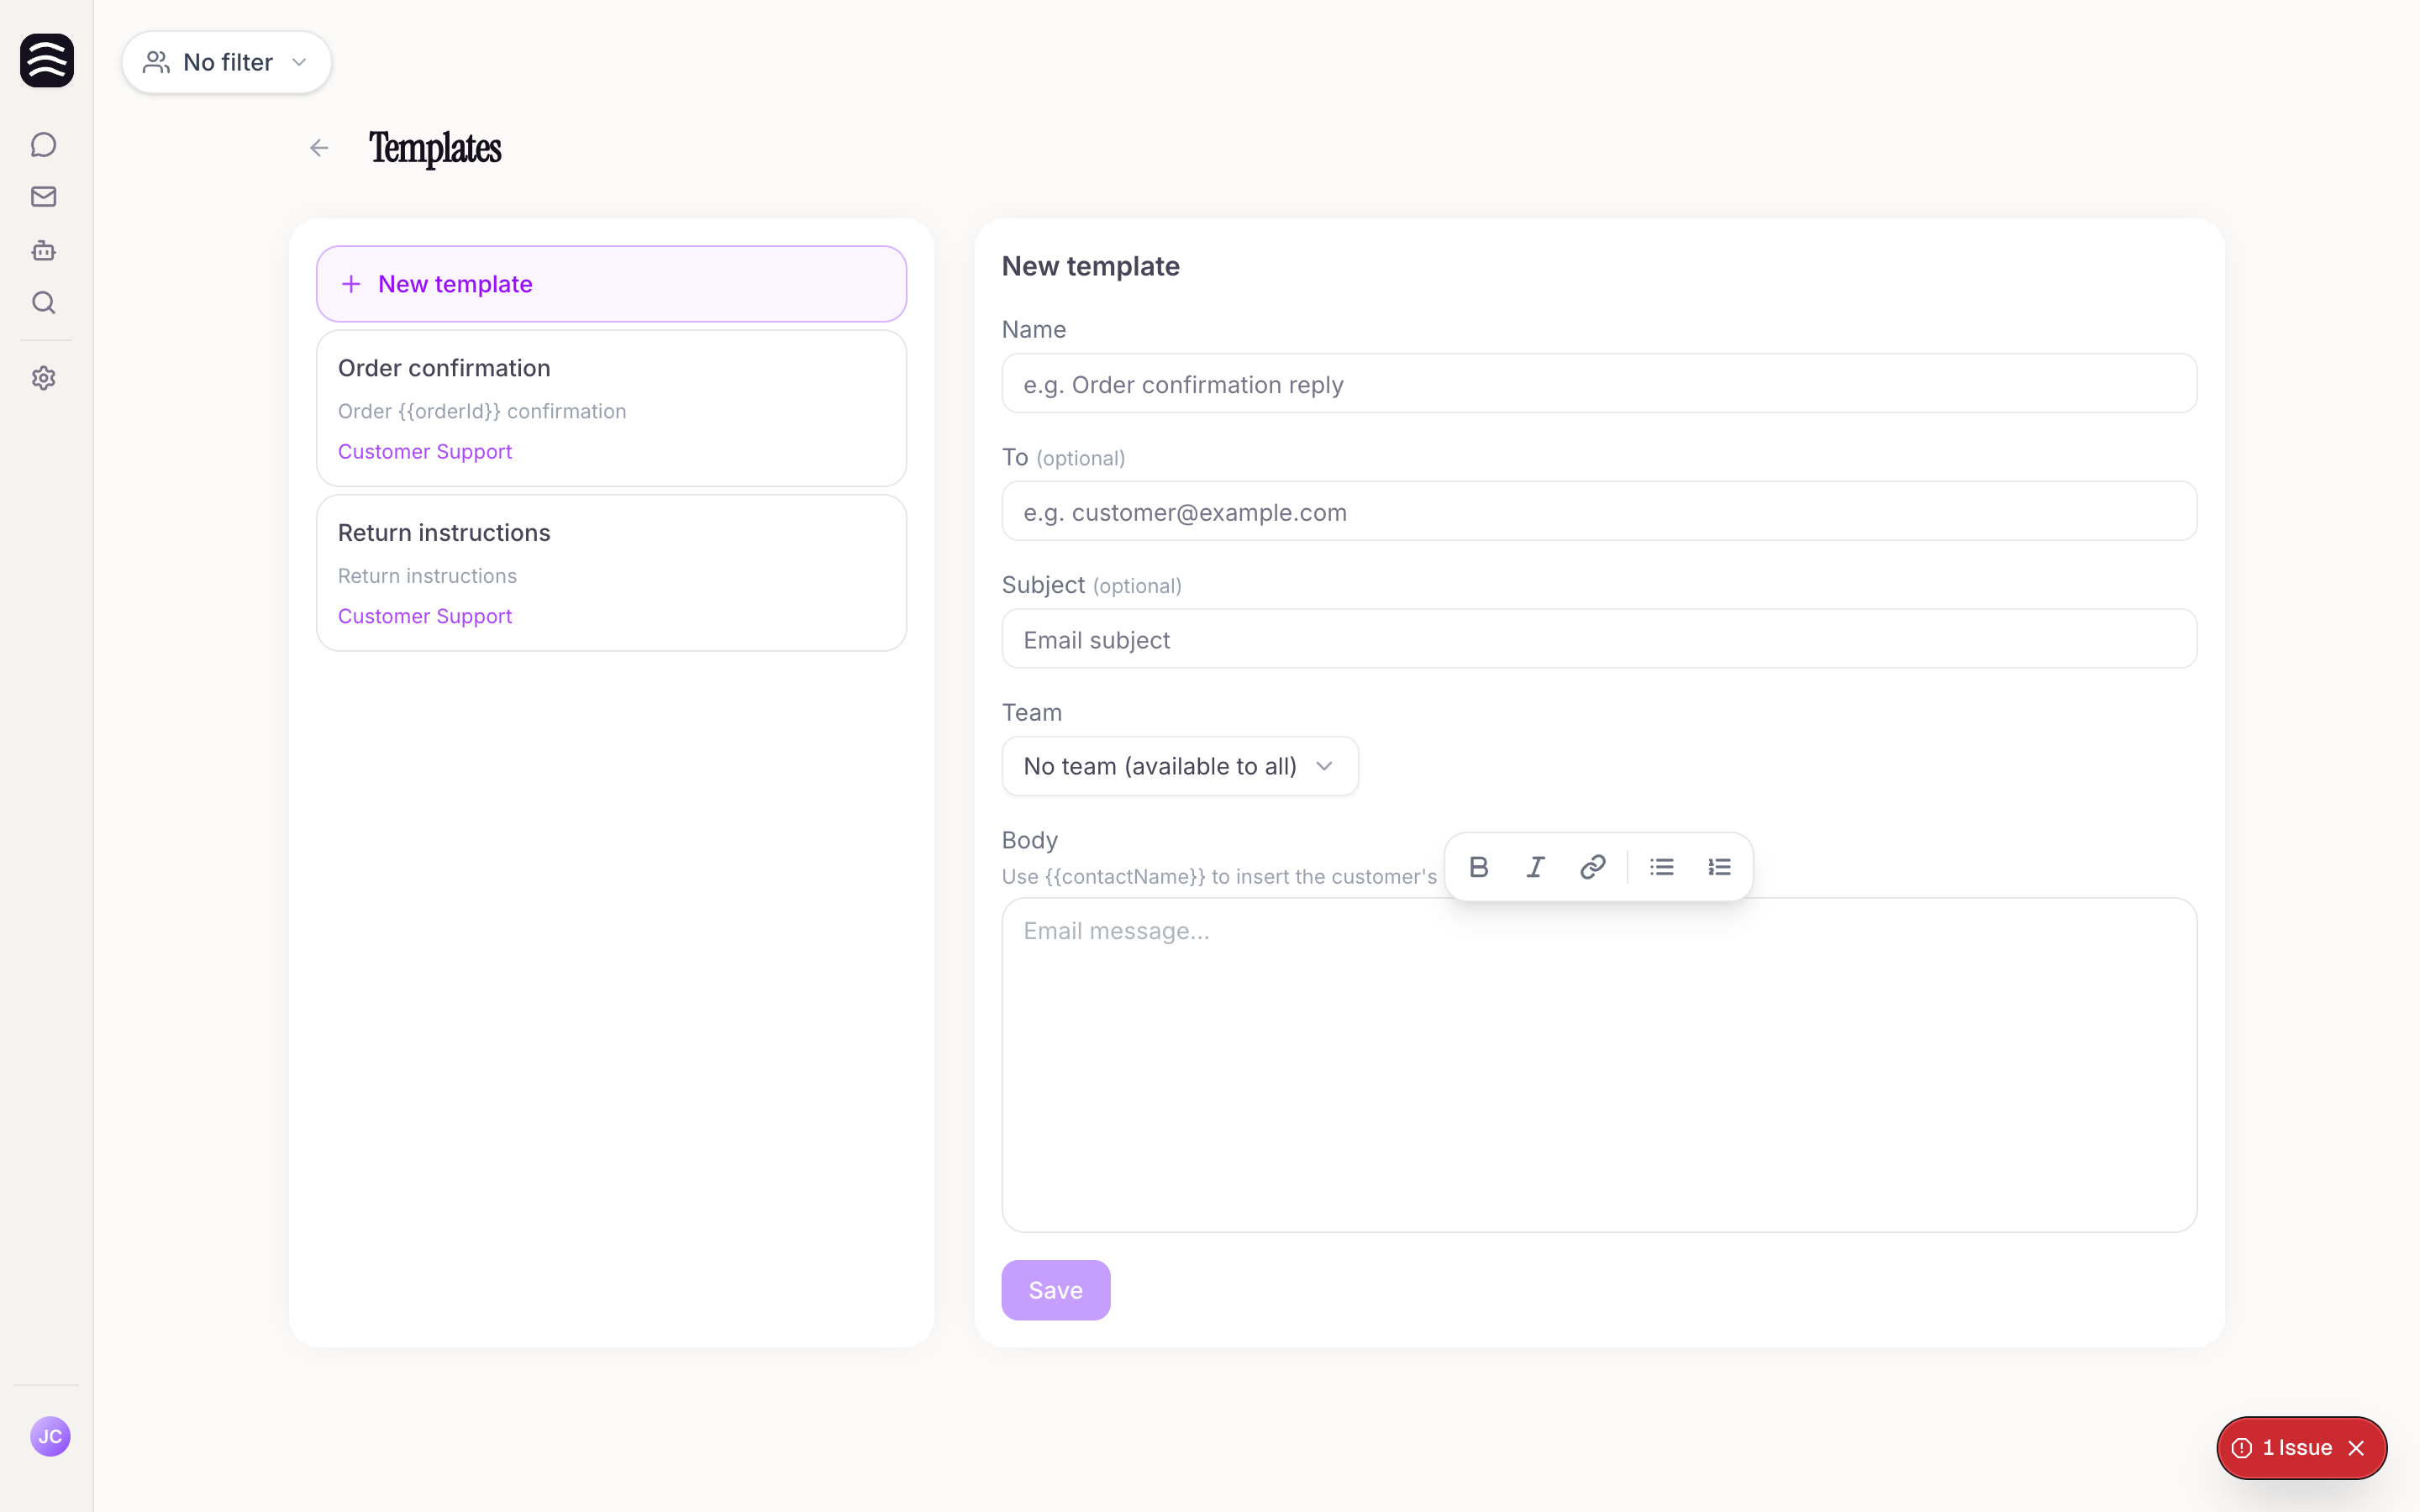
Fill in the details:
Fill in the details:
- Name: A descriptive name (e.g., "Order confirmation reply").
- Subject (optional): A default subject line.
- To (optional): A default recipient email.
- Body: The main content of the template.
- Team: Assign the template to a specific team, or choose "No team" to make it available globally to all operators.
Using Dynamic Placeholders#
In the body of your template, you can use {customerName}. When you apply the template to an email, Whisper will automatically try to insert the recipient's actual name.
Editing and Deleting#
- To edit, click on an existing template, make your changes, and save.
- To delete, click Delete template and confirm the prompt.
Related Articles#
Email Signatures#
In Whisper, you can easily set up a unified email signature that automatically appends to all outgoing messages from your organization.
How to set up your signature#
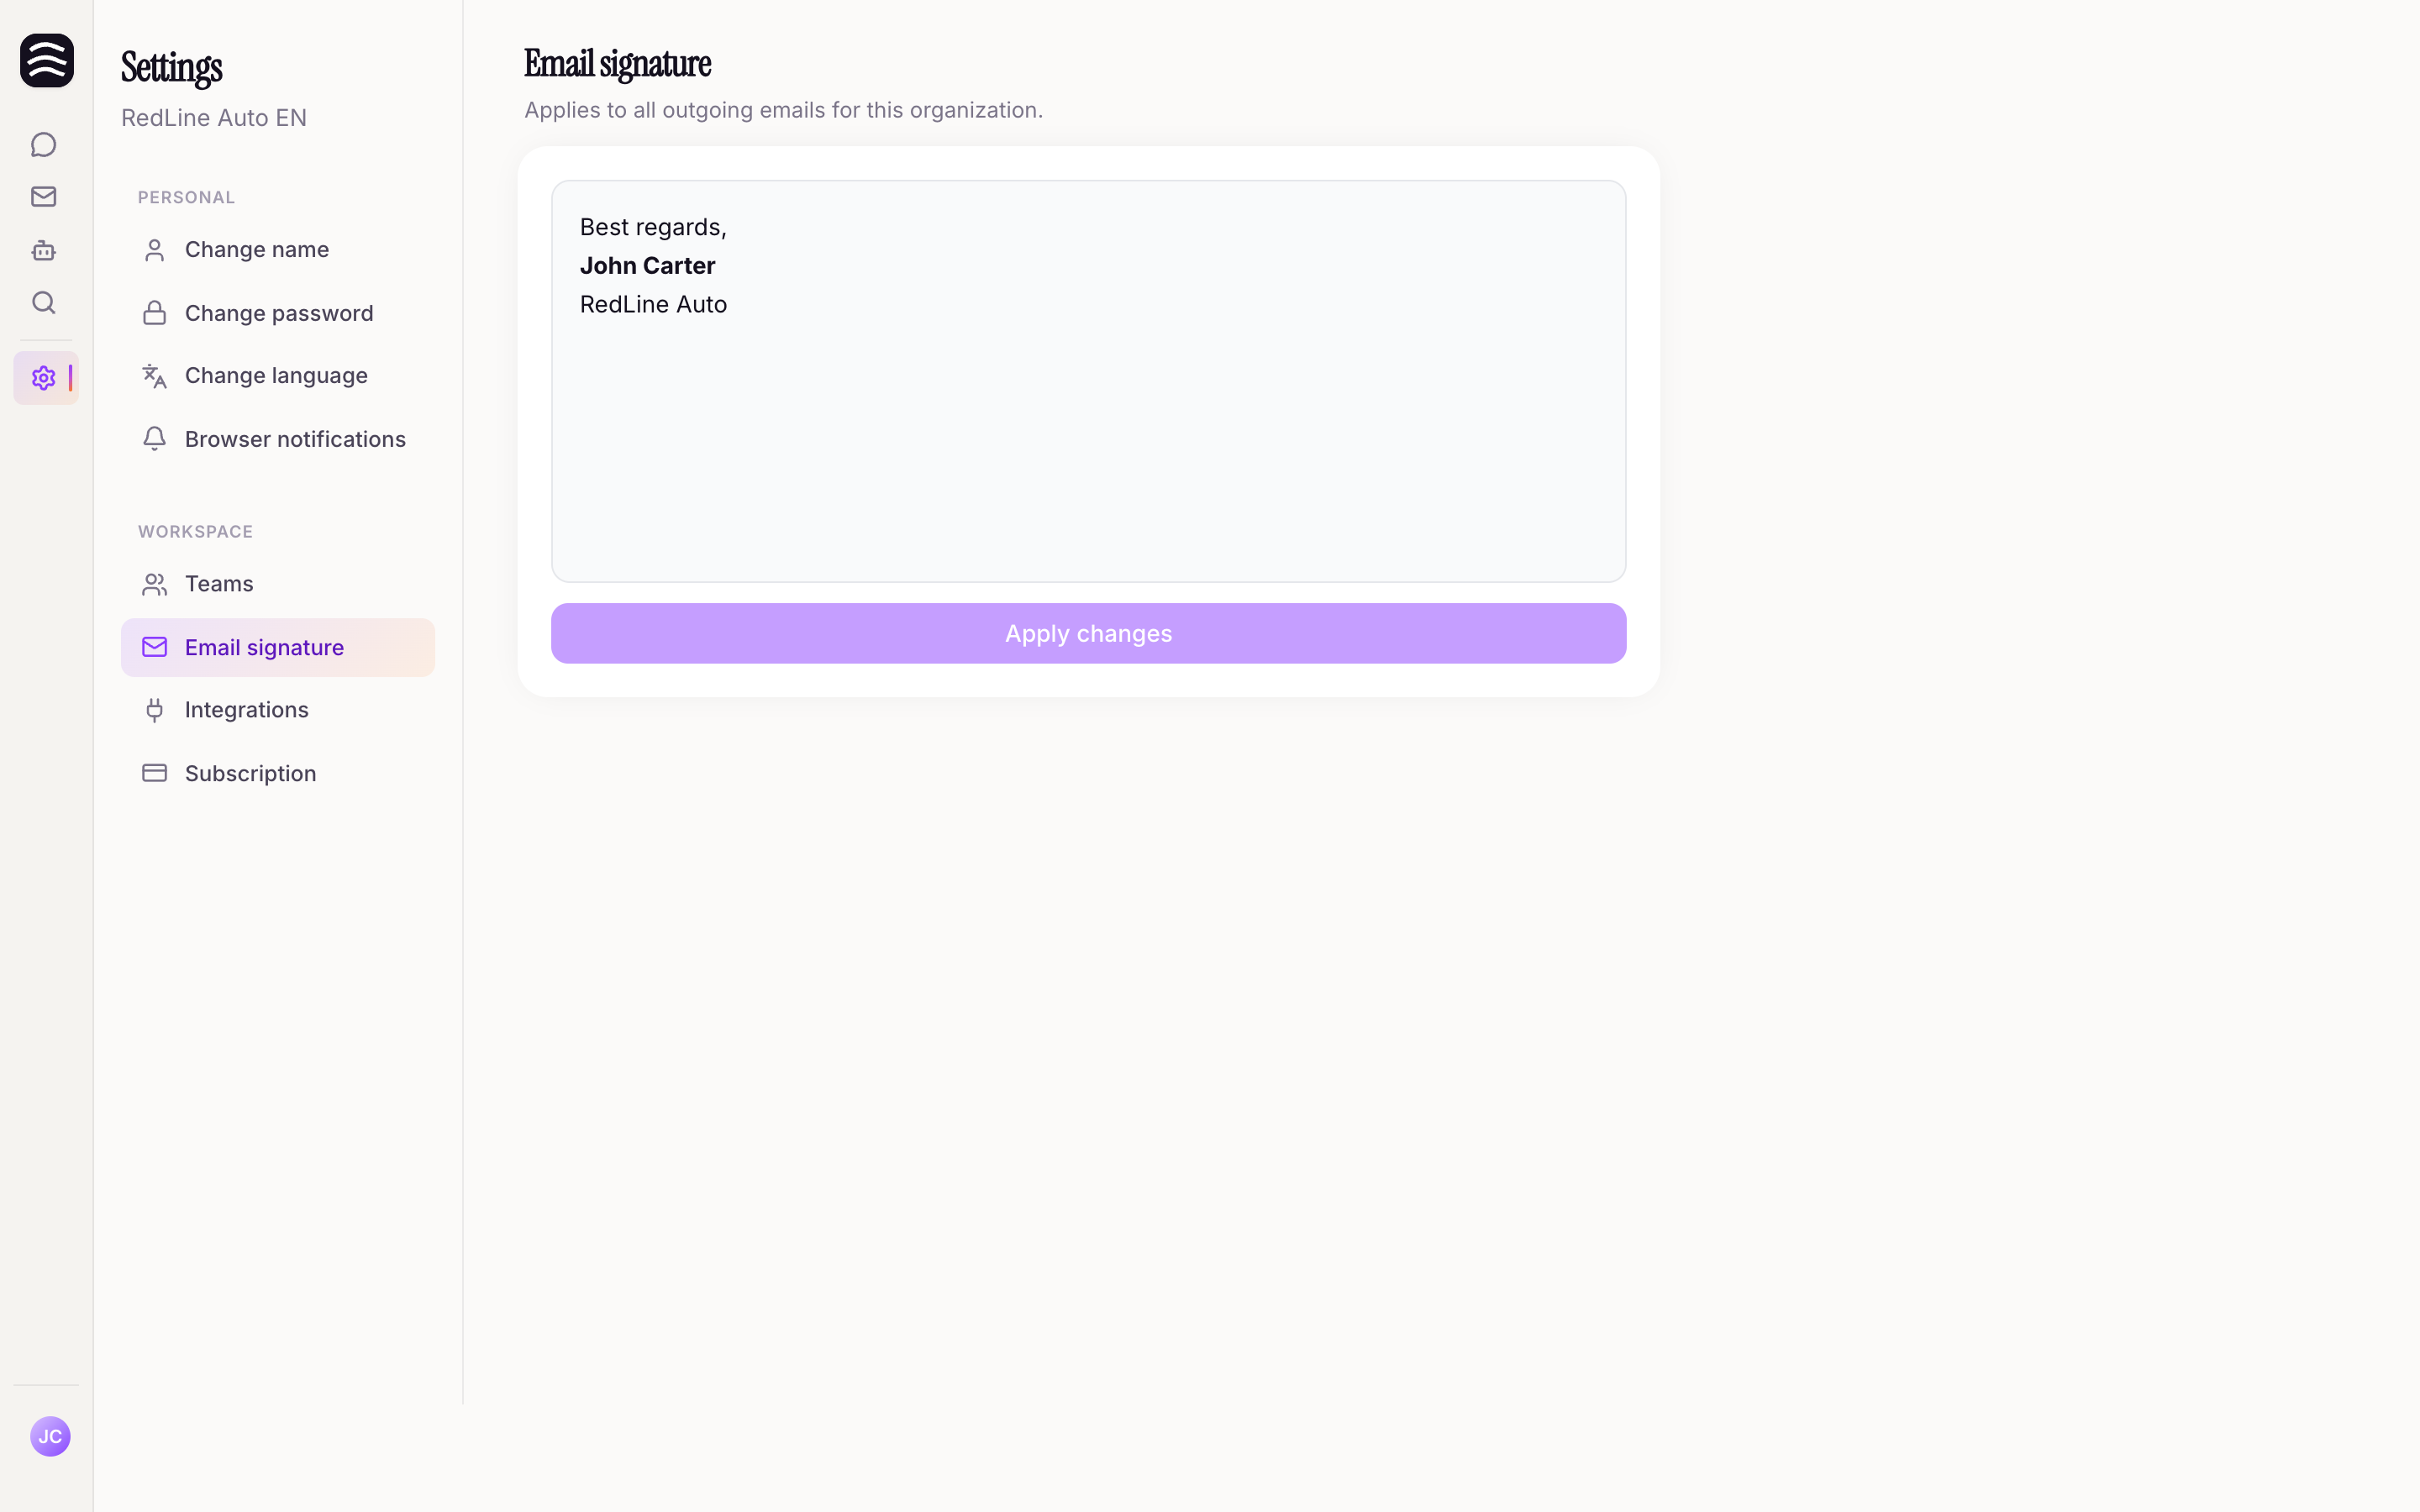
Navigate to Settings > Signature
Select Settings > Signature from the left sidebar. (Note: You will only see this section if you are on the Pro plan with the Customer Support feature enabled).
Create your signature
Use the markdown editor to format your signature exactly how you want it.
Save your changes
Don't forget to save your settings.
That's it! This signature will now be automatically added to all new messages and replies sent from Whisper on behalf of your organization.